Fresh off the grill sweet n salty rainbow carrots. Full of flavor and something the whole family will love. It’s a side that goes well with nearly every main dish. Oh and they’re easy!
RECIPE INDEX
- About this recipe
- Alternatives
- Planet Friendly Points
- Recipe Steps Explained
ABOUT THIS RECIPE
I love the grill because it’s one full cooking surface. I have a Traeger and I use it religiously. The flavors the grill produces is undeniable (THIS IS NOT BY ANY MEANS ANY TYPE OF ADVERTISMENT) I just genuinely love it. You can easily use foil. The grill not only makes clean up easy, but your cooking flows become a lot simpler using one cooking method and having all your ingredients cooking on one spot in front of you. Talk about effIcient!
ALTERNATIVES
CARROTS. Use 10 baby carrots. You’ll want to watch these. Flip them a little earlier and take them off the grill earlier. No need to cut in half. The medium rainbow carrots I used were from Costco… Shocker! haha
Because of their robust size and texture these will take to the grill better than baby carrots meant more for steaming and snacking, but you can totally still use them! I’d use 10 standard large carrots. Slice in half down the middle and slice in half long ways.
GARLIC. Feel free to use fresh garlic if you have the time! You know we love those fresh ingredients!
PLANET FRIENDLY POINTS
I love using foil for cooking! Easy clean up and easy to shape the type of cooking vessel needed for whatever you’re cooking. It’s best to get your char marks on meat, corn etc, but is also serves as a great way to help keep your grill clean longer. Foil is highly recyclable and upcyclable. The tricky part is, actually getting it to that point. If we’re cleaning the foil off. It’s more likely to be recycled and not immediately tossed into the landfills.
You can also reuse foil! If you use it to bake chicken nuggets for lunch, use it on the grill for dinner!
When it comes to cleaning, just toss it in the dishwasher before putting it in the recycle. That way you’re not doing anything too labor intensive, makes it easy least.
I don’t know about you but I LOVE heirloom produce. So unique, embraces its own special qualities. Instead of blending into the unique strict grocery store look. Because heirloom items aren’t forced into this uniform, you get more natural, more nutritious, good for you and the planet items that look beautiful too!
RECIPE STEPS EXPLAINED
1 Pre heat your grill to 400.
Our carrots are a harder veggie and require a higher cooking temp, though 400 degrees is still a common temp so you can toss other items on the grill with it and still get the cook you want!
2 Cut you medium carrots in half long ways.
Refer to alternatives on cutting and prepping other types of carrots! Note: baby carrots will cook faster. Make sure to check often, flip sooner and over all cook for less time. I would start at cooking for 10 minutes and flipping then checking at 10 minutes again
3 Whisk your glaze together. Reference ALTERNATIVES for ingredient substitutes.
- 20 medium carrots
- 6 cracks pepper
- 3/4 cup honey
- 1/2c olive oil or avocado oil
- 1 1/4 teaspoons sea salt
- Some extra sprinkling sea salt to taste after grilling
- 1/4 teaspoons garlic powder
4 Drop your carrots into your glaze and coat evenly.
TIP: use your whisk to move your carrots around and shake the glaze over top to save dishes.

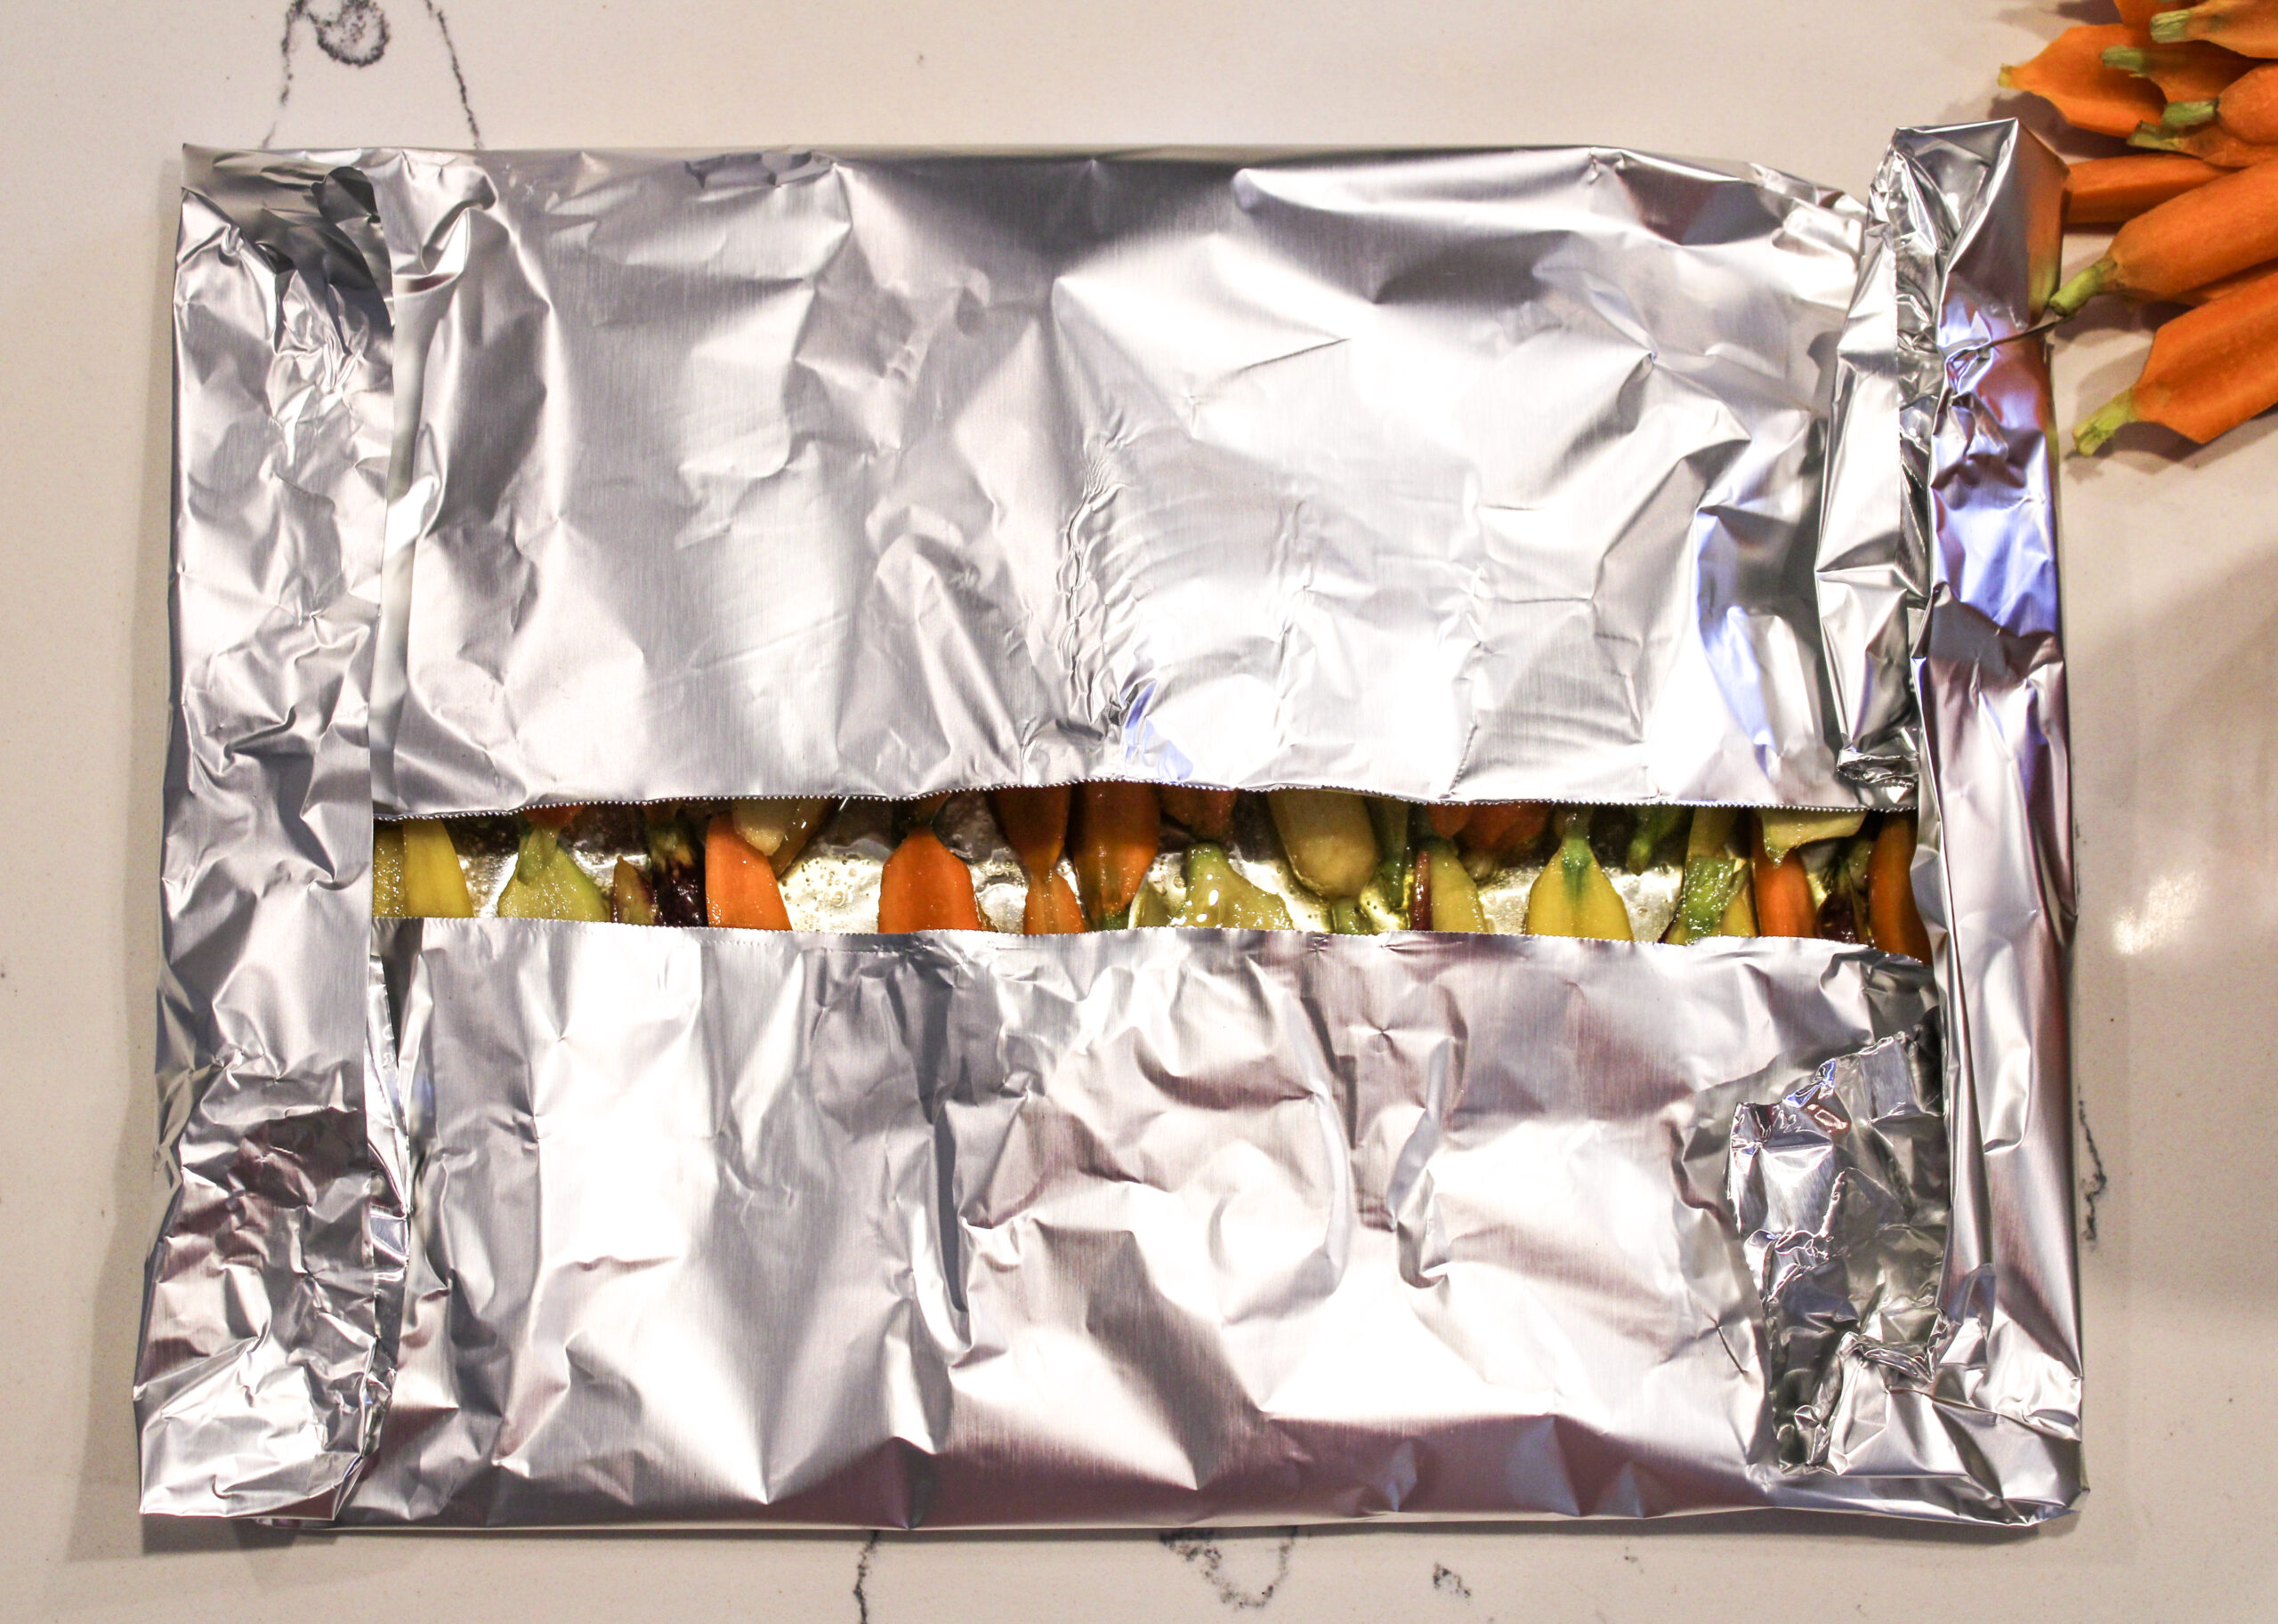
5 Pay out your 2ft x 2ft foil on the counter.
Lay your carrots out giving them each as much apace as possible so they can cook evenly and get some crisp going on the grill! I like to line mine up in rows as pictured. Fold up your foil around your carrots. Fold the horizontal sides (also the top and bottom sides) up over the carrots like a hot dog bun. Then fold in the vertical shorter sides. Lightly because you’ll reopen them once you’ve got them on the grill. The folding is primarily for transport.

7 Grill! Place your carrots on the grill for 18 mins.
Once on, open up the foil a bit and angled like a. Little tent. Having open foil will allow for more crispiness. Less open means more steam and mushy. TIP: Carrots typically tend to take the longest to cook. They take longer to cook than meat and probably most grains like rice.
8 Time to flip!
No one has time to flip each individually. Do your best to toss them then spread them back out again so they can still get crispy
9 Set timer to cook for 12 more minutes.
Keep an eye out on them especially during this time. Once they start to get brown and black with char markings is when they’ll be ready to go! Check every so often and test with a fork before removing to ensure they’re cooked through. Set a timer to cook for longer as needed.
10 Remove your carrots from the grill and drizzle your glaze over the carrots. Sprinkle chives over top and serve immediately!
When adding the glaze to the carrots post grilling, feel free to toss. They tend to cool quicker this way so feel free to drizzle! A quick tip on sauce drizzles is using a pair of tongs (I like silicone because it holds more). “Grab” the sauce and lightly shake over your veggies.
Top with parsley chives finely grated parm goat cheese or pinenuts. Or a combo! I used chives only. it’s possible to make a dish look fancy without a lot of work!
TRY IT WITH THESE RECIPES
- 20 minute grilled chicken

Rainbow Honey Glazed Grilled Carrots
Description
Fresh off the grill sweet n salty rainbow carrots. Full of flavor and something the whole family will love. Pairs well with any meat!
Ingredients
Instructions
-
Start Grill
Pre-heat grill to 400 F degrees (reference note 1)
-
Slice carrots
Slice carrots in half long ways (reference note 2)
-
Make glaze
Make glaze and whisk in medium bowl. Whisk all ingredients together:
20 medium carrots
6 cracks pepper
3/4 cup honey
1/2c olive oil or avocado oil
1 1/4 teaspoons sea salt
Some extra sprinkling sea salt to taste after grilling (reference note 3)
1/4 teaspoons garlic powder
-
Toss carrots in glaze
Toss carrot son glaze by adding them to your glaze bowl and mixing the with your hands or TIP: Use your whisk to save dishes. (reference note 4)
-
Remove carrots and place in foil
Remove carrots with hands (or optional tongs) tapping any access back into the glaze bowl. Place carrots in a 2ft x 2ft approx size foil. (reference note 5)
-
Space out your carrots on your foil evenly
I like to line my carrots up! Do your best to make sure they're spread out evenly and not touching each other as best you can (reference note 6)
-
Fold the foil like an envelope and transport to grill
Now we're ready to grill! Fold up your foil making a little envelope to help transport our carrots to the grill. Refer to steps above if needed to achieve the shape in our photo here. (reference note 7)
Once on the grill, open the foil up a bit so we can vent the carrots more to allow for more crispiness! YUM.
-
Grill time!
Grill on oven for 18 mins. Chop chives and prep any other meal items while waiting. (reference note 8)
-
Flip carrots
Once your 18 minute timer goes off then flip your carrots the best you can. (reference note 9)
-
Grill for another 12 or so minutes
Keep an eye out. Check with a fork for softness/tenderness and for browning. Color= flavor! (reference note 10)
-
Remove from grill and glaze
Remove your carrots from the grill carefully and drizzle your glaze over the carrots. Sprinkle chives over top and serve immediately! (reference note 11)